- Start Zoiper Softphone
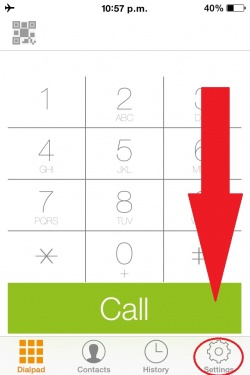
- Click on Config icon on the Zoiper screen
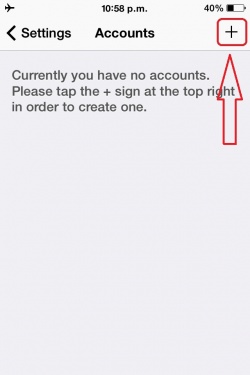
- Click on the ” + ” icon to add an account
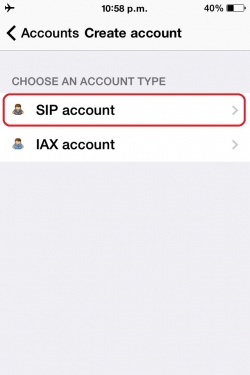
- Select SIP. This guide was made using a SIP account.
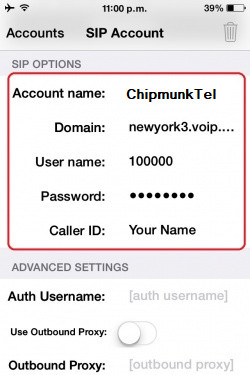
- Fill in the fields with your SIP account information
- Account: ChipmunkTel or choose another name for your account.
- Domain or Host: toronto4.voip.ms (your Account Rep will provide this)
- Username: 100000 (your Account Rep will provide this)
- Password: ********* (your Account Rep will provide this)

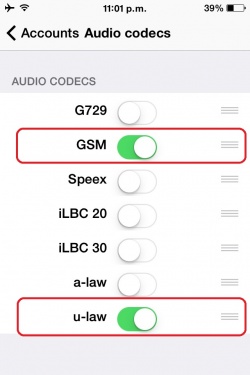
Audio Codec Configuration
- Go to “Audio Codecs” section
- Unselect all the codecs, leaving only GSM and u-law selected.

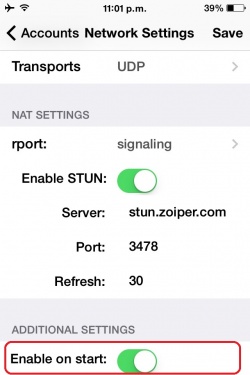
Configuring ZoIPer to start with the phone
- Under the SIP account’s settings on ZoiPer, please go to “Network Settings”
- Then, activate “Enable on Start”

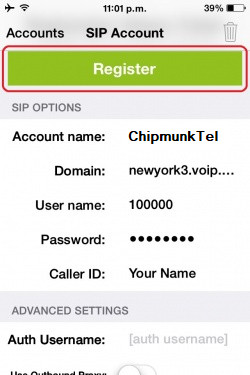
Registering the account
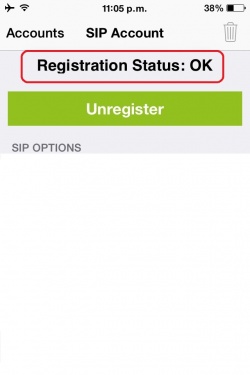
- Now that you have configured your ChipmunkTel account (or sub account) in ZoiPer, go to the top of the Account’s setting screen and click on “Register”
- If everything is correct, you should see a message that says “Registration Status: OK”
Configuring ZoiPer to keep running all the time
Some customers mention that ZoiPer loses registration, this is because iOS closes the internet connection and the app after some time without use. You can configure ZoiPer to force to keep alive the Wi-Fi connection and keep running the app in the background. To achieve that follow the following steps:
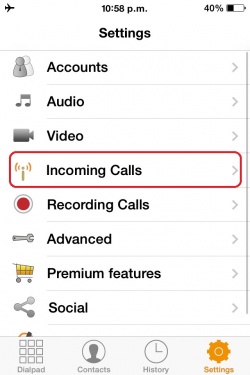
- Open ZoiPer and go to Settings then select “Incoming calls”
- Once there enable both options